Level: Kingdom of Atenveldt, A&S Competition (awarded on Saturday, 15OCT22)
Paint: None used
Pen & Ink: This was a black scroll and I have yet to find a good gold ink that looks good on black paper.
Illumination: None
Paper: Legion Stonehenge Aqua Black Watercolor paper, 640 gsm/300 lbs and an Orange water color paper for the background
Knife: X-Acto #1 Knife with #11 replacement blades (broke 2 blades)
Time: Approximately 10+ hours
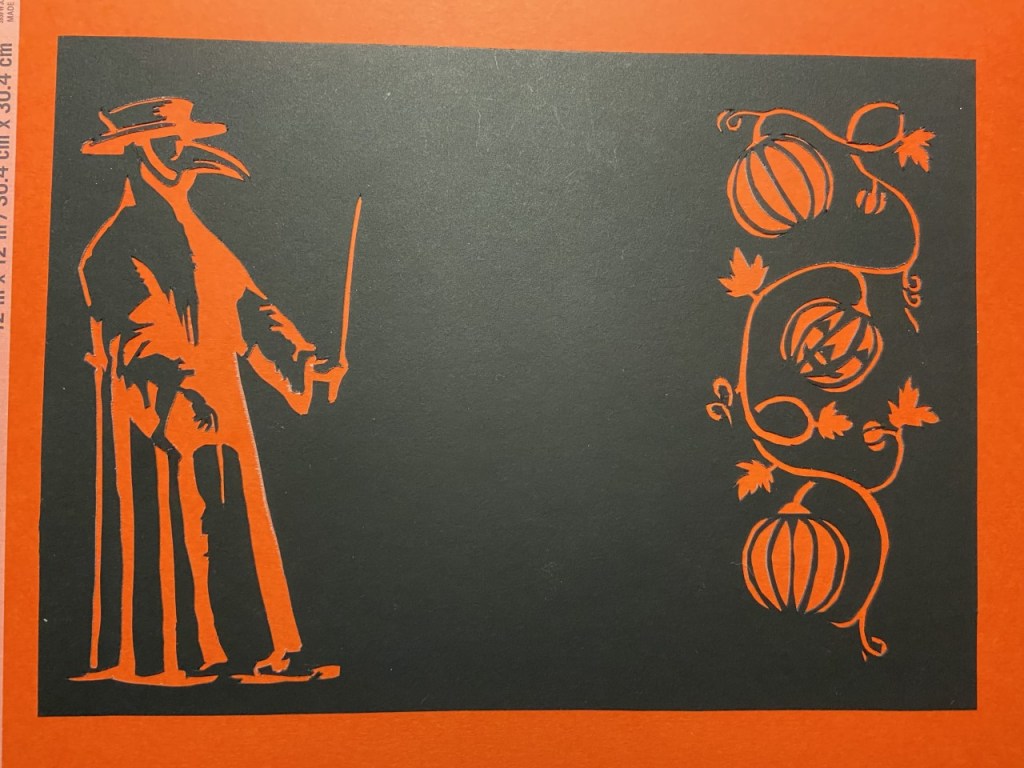
Inspiration: I found the plague doctor image in Pinterest from the vendor TheBrewSpiritTea as a vinyl cutout. But upon further research it looks like this person obtained the image from a wood stamp from the time of the Bubonic Plague. So, I cannot give the exact source at this time.
I was asked by Sir Caell Robertson to make this for him as the scroll for the Queen’s Prize at the Atenveldt A&S Competition this past weekend (15OCT22). As I stated in my main blog post, this went to someone whom I think of as one of Atenveldts apex scribes and I was a bit mortified that she got one of my scrolls. That being said, I was happy to see she was delighted to receive said scroll.
As with everything I do, I learn something new, tweak my process, or try something I had been thinking about. Although this scroll was not “medieval” in the pure sense, it was a scroll and a bit whimsical at that. I originally thought about doing a botanical scroll with the plague doctor on one side and various botanicals down the other side, but I wanted to also capitalize on the momentum of the recent laurel scroll I created. Still focusing on the plague doctor, I decided to go whimsical and in tune with the approaching Halloween holiday.
The plague doctor’s image was placed over the black paper, and I cut out the image from there (as opposed to the first paper cutting where I traced out the entire scroll on the “back” of the paper). The pumpkins and vine were cut freehand without any preconceived image. I will cover this more shortly when I finally get around to documenting my process for paper cutting, but through the various “free-floating” cutouts are held together by “bridges.” I had often worried about reattaching the cutouts should I rip or cut too far into the bridge and detach the image. As any self-fulfilling prophecy does, I managed to detach a few images from the main body of the cutting. I thought to use superglue, take a small piece of paper, and reattach the bridge to the main body. The main concern being that the super glue would create an oily stain or other visible blemish on the viewable side, but this worry was short lived since I had to reattach two bridges. This worked on black paper but I have yet to perform the pair on any white paper.
I also was able to change how I attached the paper cutting to the backing paper. In my first scroll, I used stick glue, which was a pain since it would tug at the paper as I applied the glue. My solution to this was to use a spray-on adhesive. The only warning I have to give is to make sure you do not move the paper cutting once you have sprayed the glue on the backside of the image and placed it upon the backing. This will potentially leave a glue smudge if you move it.
Please note: The paper cutting appears crooked because it is. I purposely placed the cutting down on top of the backing with room on all sides. A straight-edge paper cutter was used to even up the edges and use the backing to create a 1/2-inch border.
