In the SCA a lot of us like to base our personas on a specific time period and region. In my case I am non-specific; I like the loose fit of Viking clothing (t-tunic and baggy pants) as well as some of the tighter fitting 14th century clothing. A lot of the people in Atenveldt are primarily Viking or Baltic region based personas. My wife is trying to focus on the Latgallian (where modern day Latvia is at) region since there are less people focusing on that type of dress. If you look at the map, Latvia is just a hop, skip and a jump or a ferry across the Baltic Sea from the traditional Viking areas. Gotland, which is off the coast of Sweden in the Baltic, was a major trading post in medieval times so these types of chains were seen throughout the area.
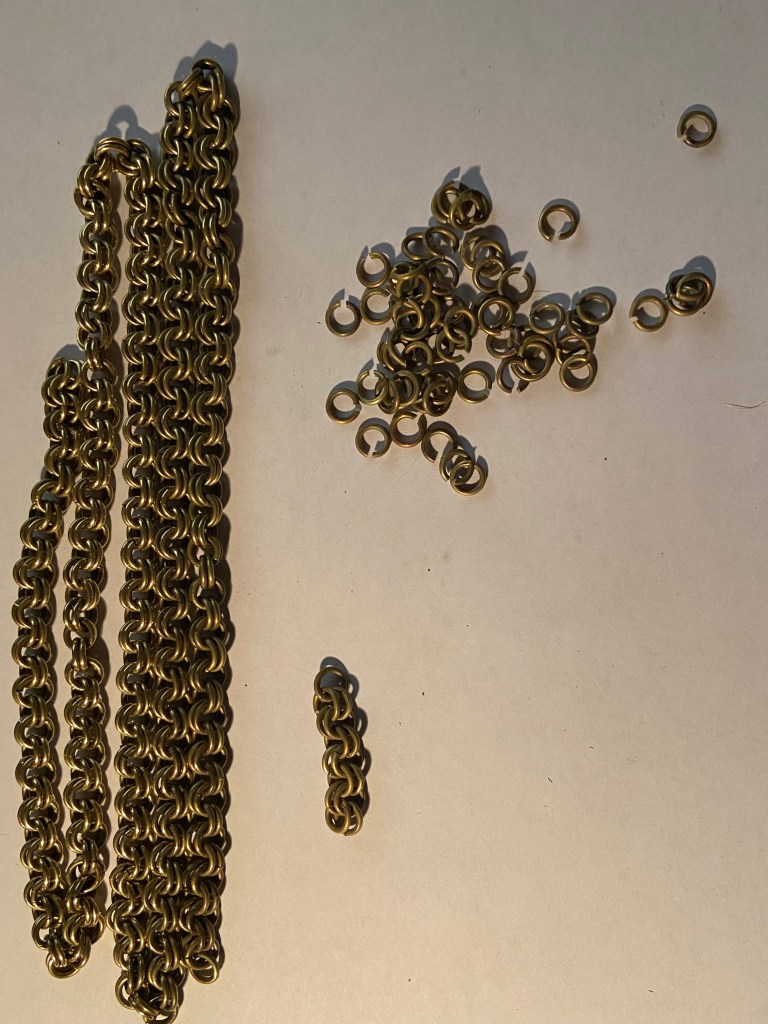
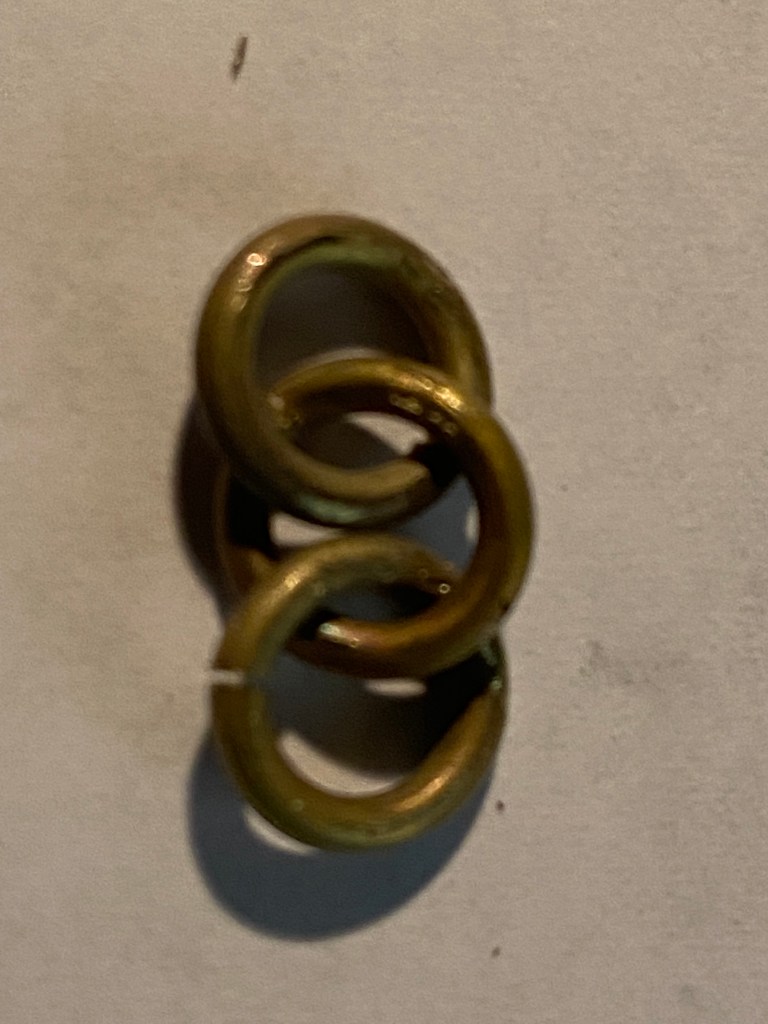
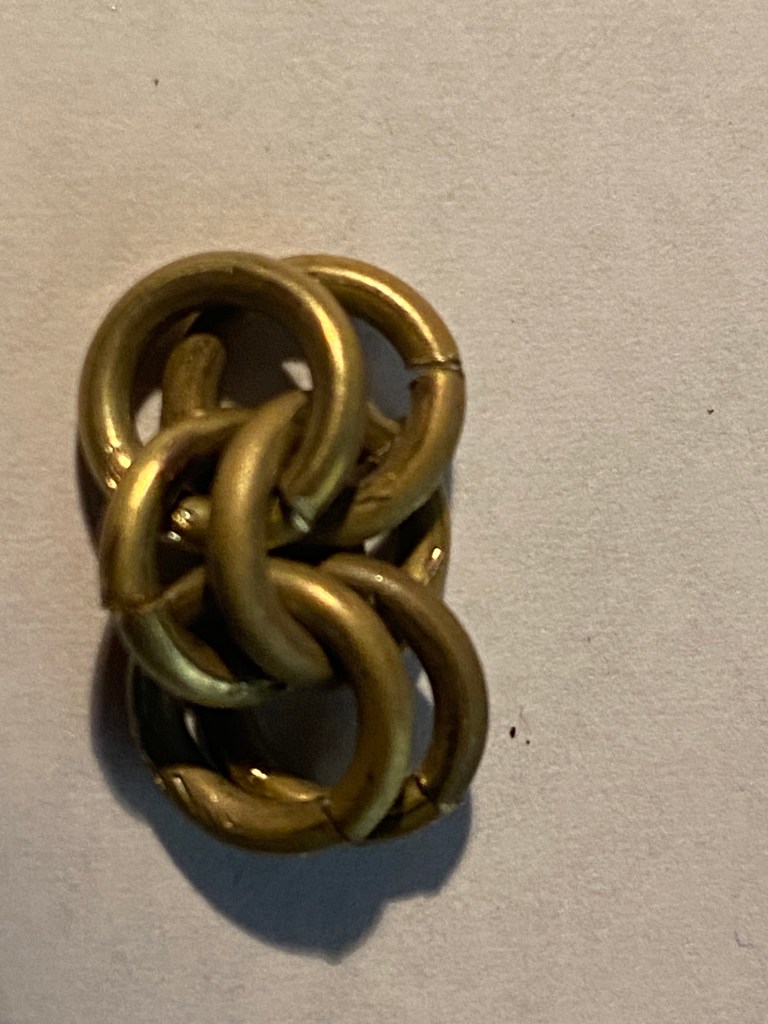
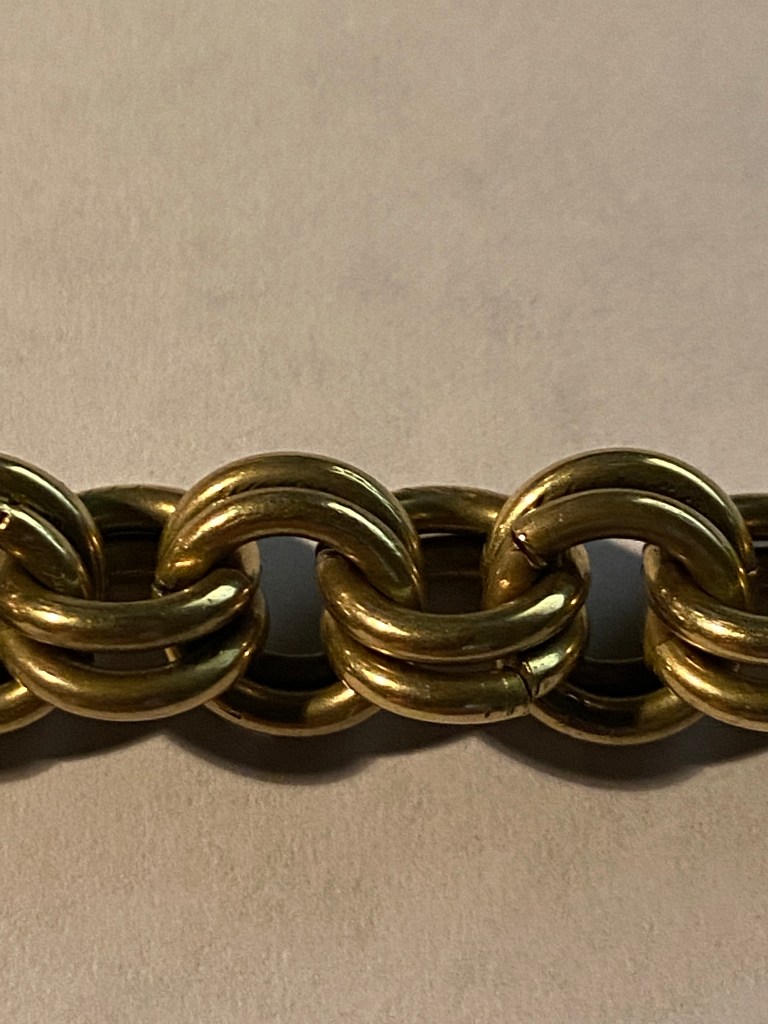
The chain I am working on is a basic 2:2 pattern (Birka Type 2)…two rings bound to two rings, repeating. It appears in several locations (based on burial mound findings) in the traditional Viking areas as well as locations in and around the Baltic region. It is a relatively easy chain to make and once you have a supply of rings built up, you can sit on the couch (or on a long plane trip as in my case) and weave away. Once you master this, it is not hard to jump to other ring combinations or your traditional chain maille (although I do not advise using butted chain maille for SCA combat due to its weight and repetitive repairs…it is better to use the flattened links because it is more authentic and weighs less).
Tools You Need
Making chain is relatively easy and inexpensive but there is still a little bit of investment. To get started you will need:
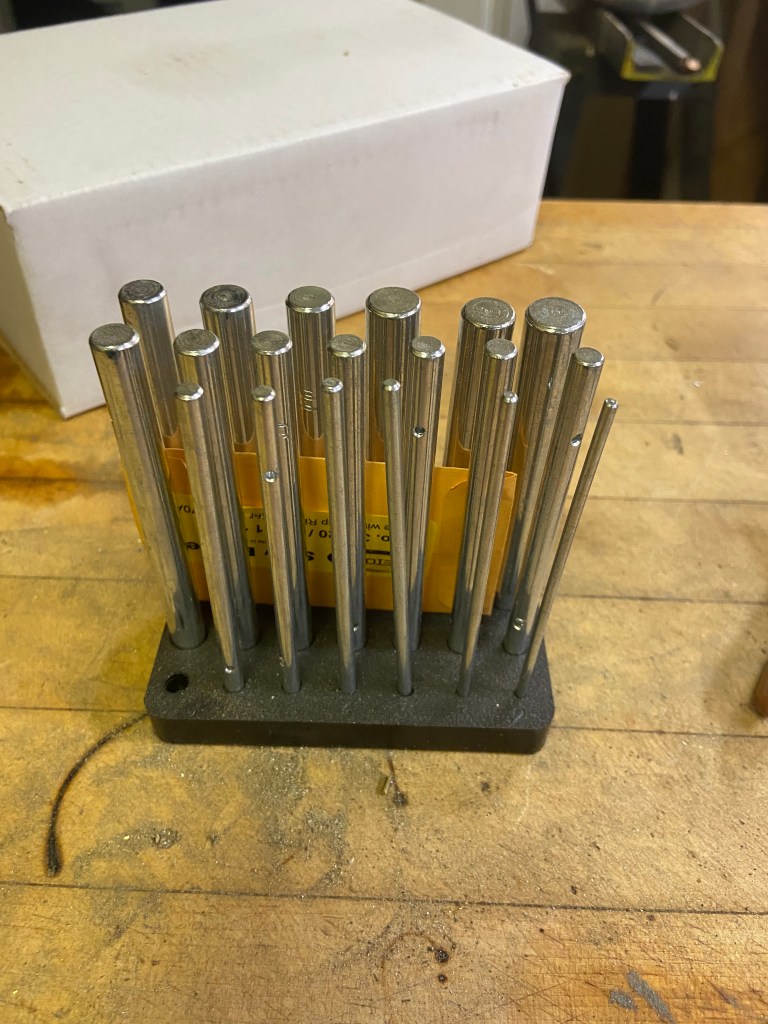
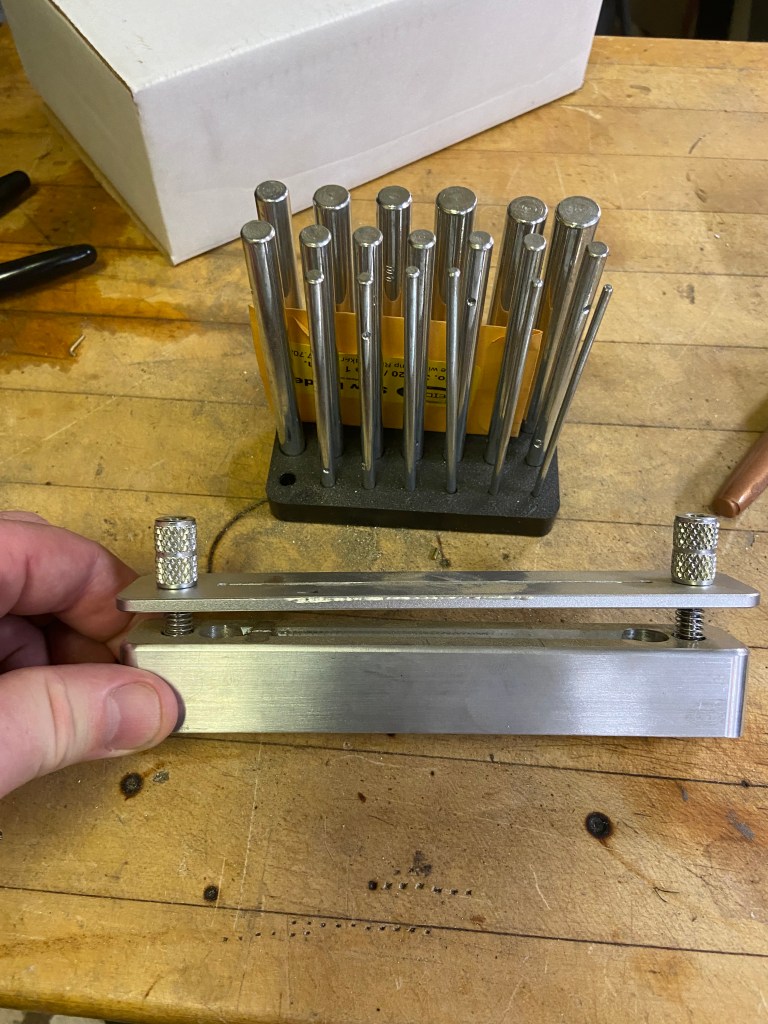
- Mandrel…this is a shaft in which you wrap your wire around. You can use a dowel rod, metal rod or anything that has a consistent diameter. Various size mandrels will come in handy when you want to play with other ring patterns and diameters. The only down side with using a wood dowel is that it will compress and your rings might not turn out consistent.
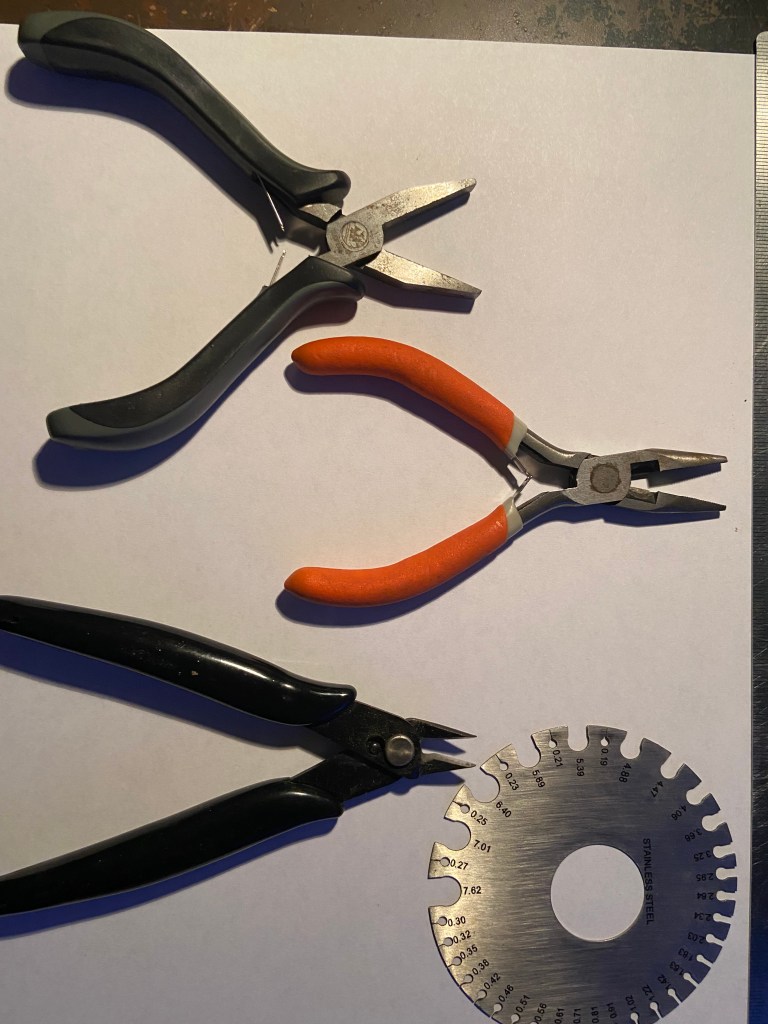
- Wire cutters. You will need these to cut your rings and expect to go through these on a regular basis. You will find that using wire cutters will not give you a perfectly flat cut and will be more visible to the naked eye. A Dremel tool with a cutting wheel, or a band saw with a metal cutting blade, will work but you need to wear heavy gloves otherwise you will be cutting things other than what you intended. Once you decide this is something you want to do on a regular basis, you can up your game and get the Pepetools Jump Ring kit (sometimes is bundled with the the Foredom Flex Shaft kit).
- 2 pliers. I like to use one thin nose (not needle-nose pliers…they are too thin) and one slightly fatter nosed plier. The fatter pliers hold the ring in place and the thinner pliers do the bending. As you develop your technique you will also develop a preference for the type of pliers you use. Just remember that they have to be small enough to grip the tiny rings.
- Other things. I have a full metal shop so I have access to many tools, but a few other things I like to have around is a ruler, bench vise, and wire gage. If you get into more ring making, some rings will require that you solder the ends together instead of the butted method we are using. Also, sanding paper and little metal files to get rid of burs and extra solder.
- Plumbers torch. You need to anneal (soften the metal) so that you can bend it around the mandrel. You can use the standard propane (blue bottle) torch, or map-gas (yellow) torch. My wife uses an acetylene torch (that is a more expensive set up and not needed for the basic stuff we are going to do). I even had the bright idea to use my gas forge to quickly anneal the brass. In this case it was not a good idea since the metal melted faster that I could pull the brass through. In hind sight, you also need to watch the heated metal and a forge just heats it too fast.
- Tumbler or Vibratory Tumbler. You don’t really need this but it helps to have it when you want to polish you chain and or other metal items.
List of Tools I use and their link to Amazon
Fordham Flex Shaft and PepeTools Jump Ring Maker v2 Combo
Wire cutters (two pack because you will eventually break the tip off)

Safety briefing…I am not responsible for setting your house, apartment, pet, etc., on fire or causing you to hurt yourself or others.
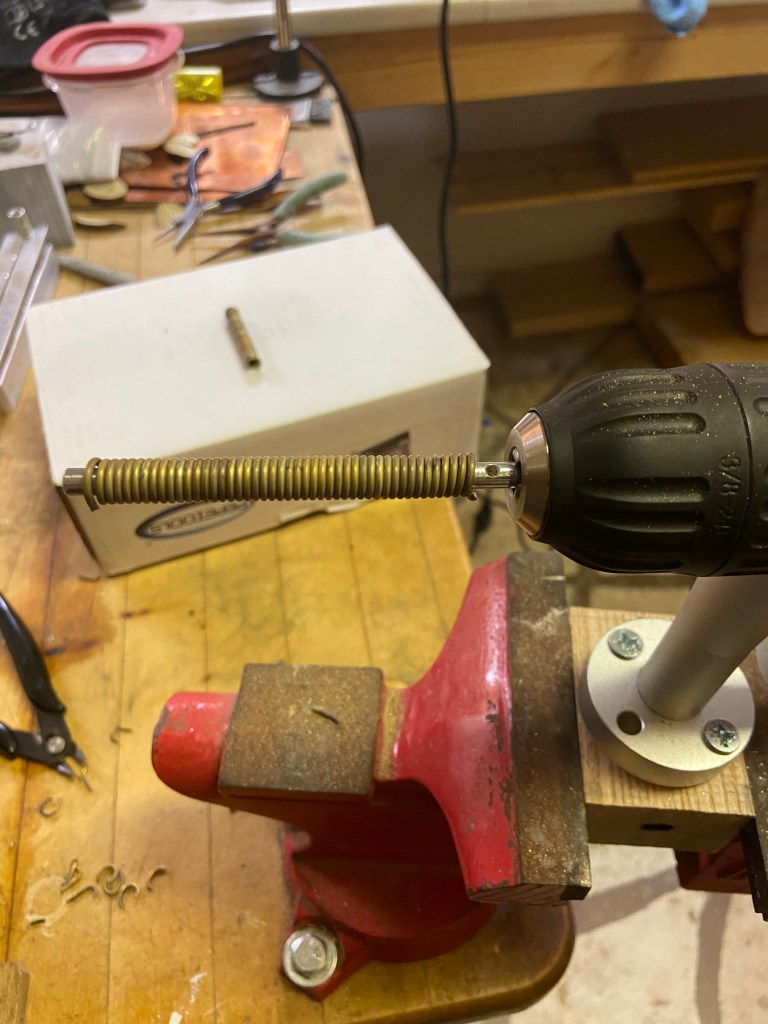
Annealing the Wire
Before you can start working the wire, you need to anneal the wire. This is done by slowly passing your torch down the length of the wire. You will need to get the wire the color of glowing orange. It is best to do this in the shade or a slightly darkened room (I can turn the shop lights off, open the outside door and have enough light to see what I am doing was well as watch the glow of the metal).
POP QUIZ: What color is hot metal?
Answer: Treat all metal as hot and you will be happy. As you anneal your metal you will notice that the orange glow will go away after you remove the heat. It is still hot and will burn you…badly. If you need to pick up a piece of suspect metal, use heavy welders gloves, tongs or pliers.
While you wait for the metal rod to cool down, repeat the process on however many other rods you think you will need. Give it all a few minutes to cool down before moving to the next step.
Annealing your wire
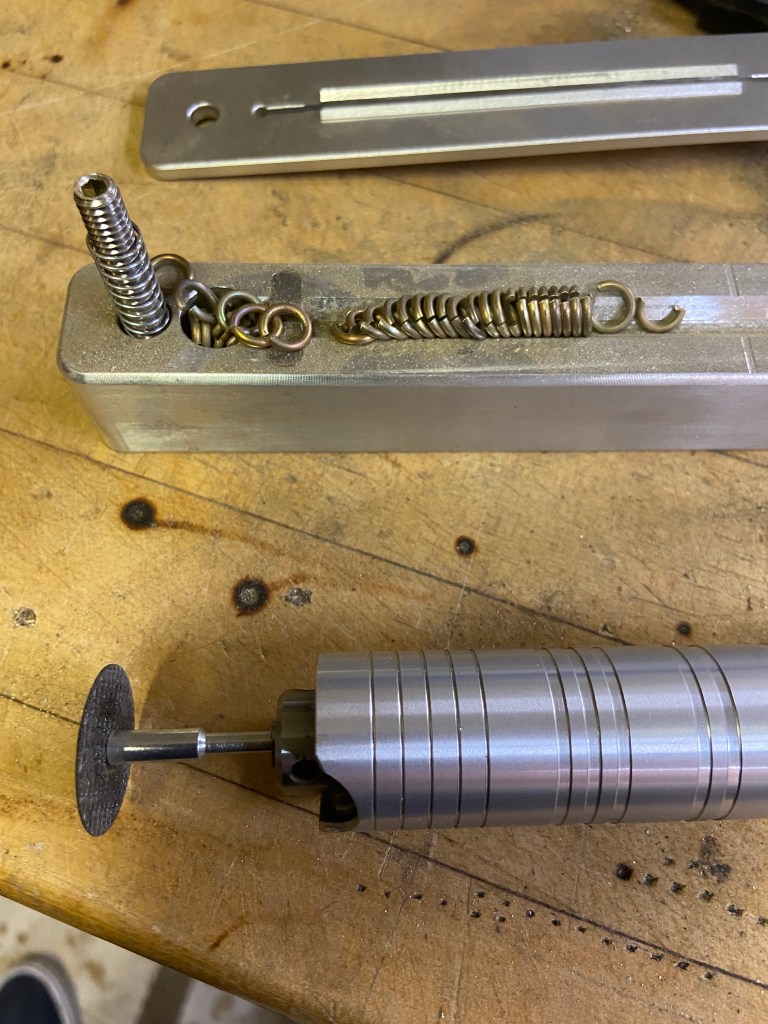
Bending the Wire to Make Coils
For my purposes, I am using 16 gauge brass rods. I purchase these in 6′ lengths and it is better to purchase all that you need since shipping will be the same if you purchase one rod or 10 rods. Depending on what you intend on doing, you will need 6 or more rods. A chain that would fit around my head needs about five to six rods.
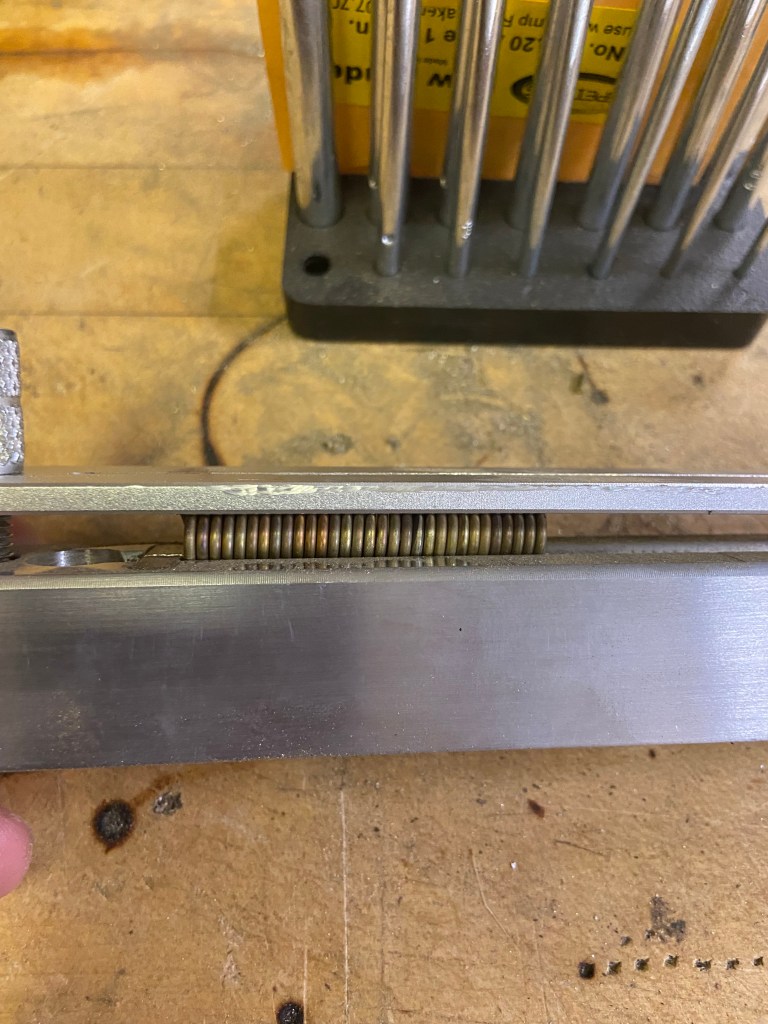
I am using a 5.5 mm mandrel and from a 6 foot rod I can make 75 +/- 2 rings (really depends on how much material you waste). It would also appear that 12 rings will make approximately 1 inch of double ring chain.

If your mandrel has a hole drilled into the top, used to secure the wire while wrapping it, insert it now otherwise hold the wire tight and start wrapping it around the mandrel. In both cases you want to make sure your wire is wrapped tightly around the the mandrel…gaps or slack in your wraps will cause uneven links and your chain will be sloppy. In the case of the mandrel I am using, I will slowly turn the handle and guide the wire with my other hand. If using the whole 6′ rod, I find that I can wrap about 2/3 of the wire before I run out of mandrel. If it makes handling easier, cut your rods in half and there should be no issues of running out of room.
Wrapping…not rapping…the wire around the mandrel.
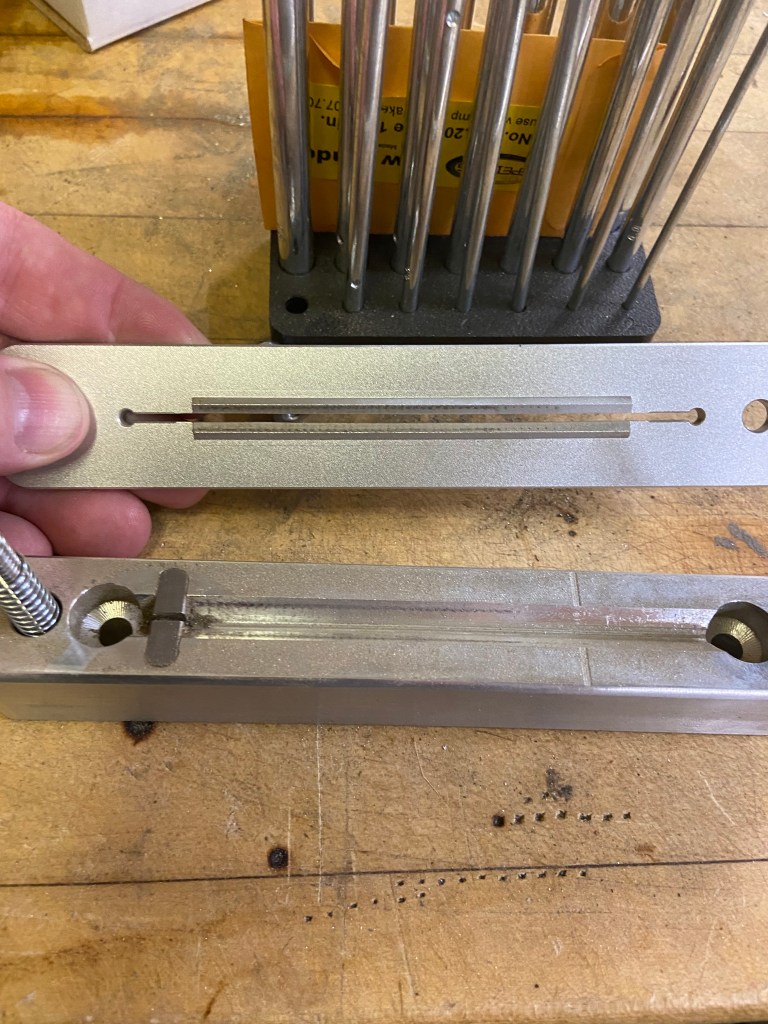
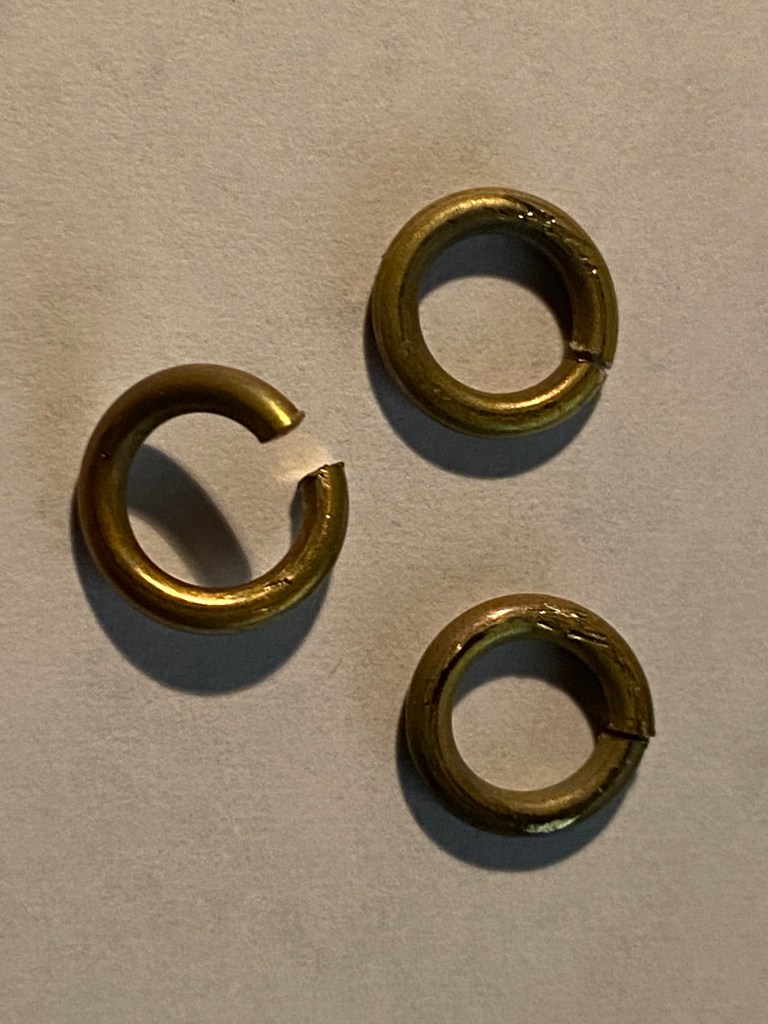
Cutting the jump rings
Once you have your coils, you are going to need to cut them. You can do this by using your wire cutter, band saw, or flex shaft tool (Dremel or Foredom). The goal is the make a smooth cut so that the ends of the wire butt up to each other and create a minimal seam or gap. Hold on to the remnants and either use them in brass castings or give them to someone so they can use it in castings. There may not be a lot, but waste not, want not.

Making the Chain
I start by picking up a ring with my fat bladed pliers, move the ring around until the open end is facing up. I then take my thin bladed pliers, grasp the other side of the ring and push (using a slight wiggling motion) the two ends together. Congratulations, you have made your first butted ring…now keep doing that for another 1000 or more times. I then repeat the process except this time, after I initially grasp the open ring, I slip the closed ring in before closing the second ring. Now you should have two rings joined together. Next you will want to double up the rings so you have two rings connected to the next set of two rings.
Tips and Trixs
Silly rabbit, trix are for kids. As you chug along you will find that you can speed things up if you pre-close half of your rings. This way, when you add your next pair of rings, you simply slip over two closed rings, close the ring and the go back and add the second ring. Sounds simple right? Not! Try to visualize it this way 2:2:2:2 are your ring sets. When you add more rings it looks like this 2:2:2:2:1, add another ring and you have 2:2:2:2:2:2 and so on. The next set of rings you add will be the closed rings 1:2 and you will add the opened ring to what you already have 2:2:2:2:2 and 1:2. Close the 1 ring up and this is what you have 2:2:2:2:2:1:2. Now go back and add the second ring so you have 2:2:2:2:2:2:2. It makes things a little faster and you will find your self not having to adjust the rings while they are all attached.
Another trick is that, as I wiggle the two ends together, I sort of push and twist the faces across each other which sort of makes them click. This means that they are about as close to one another as they will get. From there you can adjust them until the joint seems mostly smooth. This will also depend on the quality of the cuts you made when separating the rings. Wire cutters are going to be the most ragged and the flex shaft with the cutting wheels are going to the the most straight and smooth (Note: When using the flex shaft you have to make your cut in one complete motion. Stopping and starting will result in you potentially making double cuts and other slop).
You can solder the ends together, but the period examples didn’t do that. Plus, it will add a lot of extra prep time…a lot of extra time.
One finial tip, once I join the ring, I will place the smaller pliers over the joint and slightly squeeze. This helps to bring the joint together and potentially squashes the ring back from oval to circular.
I hope you enjoyed my tutorial. There many examples out there on YouTube and Pintrest and mine is just one of many. I hope to have a video of my complete process out in a few days so I can help clarify my procedure.